Discover the cozy secrets that will keep you warm and snug in your hammock all winter long!
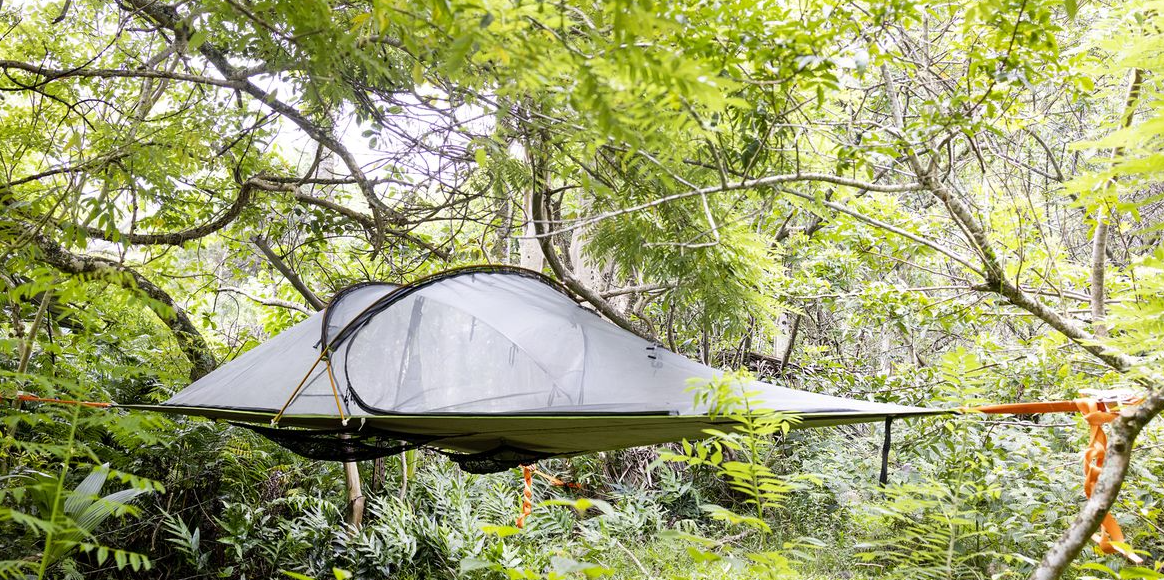
As the leaves change color and the air turns crisp, there's something undeniably magical about spending time outdoors during the fall and winter months.
However, for those of us who cherish the comfort of a hammock, the dropping temperatures might pose a bit of a challenge.
But fear not!
With a little know-how and some clever tricks, you can extend your hammock season well beyond the warm summer days and enjoy the serenity of swaying among the trees even in the chilly embrace of autumn and winter.
In this blog post, we're diving into the art of staying warm in a hammock. So, grab your favorite blanket, brew a cup of hot cocoa, and let's explore the secrets to cocooning yourself in warmth while you hammock your way through the colder months.
1) Heated Clothing
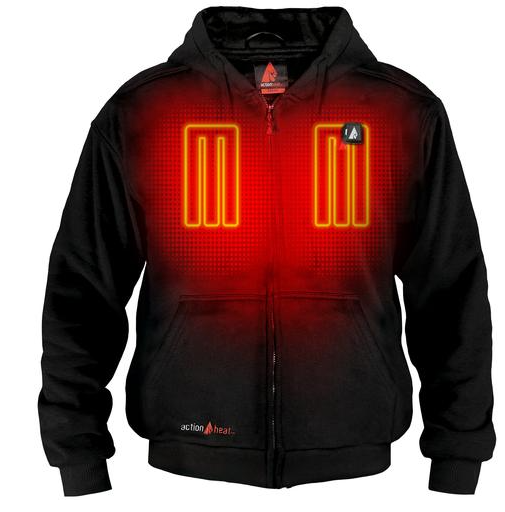
Heated clothing is an excellent addition to your cold-weather hammock camping gear, as it can provide targeted warmth and help you stay comfortable during chilly nights. Here's an expanded explanation of heated clothing:
Types of Heated Clothing:
- Heated Jackets and Vests: These are perhaps the most popular types of heated clothing. They have built-in heating elements, usually in the chest and back areas, which can be adjusted to different temperature settings. Some advanced models even have smartphone connectivity, allowing you to control the heat remotely. See the best heated jackets here.
- Heated Gloves and Mittens: Heated gloves have heating elements on the back of the hand and fingers, while mittens have a single compartment for your fingers, which helps retain more heat. They are essential for keeping your hands warm in cold conditions.
- Heated Socks and Insoles: Cold feet can be extremely uncomfortable, especially when hammock camping. Heated socks and insoles have heating elements that keep your feet warm and cozy. Battery-powered options are available for convenient use.
- Heated Base Layers: Some heated base layers have integrated heating panels that cover your core area (chest and back). These are worn as a regular base layer and provide heat close to your body's core, which can help maintain overall warmth.
Benefits of Heated Clothing:
- Customizable Heat Levels: Heated clothing typically offers adjustable heat settings, allowing you to fine-tune the warmth to your comfort level.
- Targeted Warmth: Heated clothing delivers heat directly to the areas that need it most, such as your core, hands, and feet. This helps maintain your body's overall temperature.
- Battery-Powered: Most heated clothing is powered by rechargeable lithium-ion batteries. These batteries are lightweight and can last for several hours, depending on the heat setting and brand.
- Quick Warm-Up: Heated clothing can provide rapid relief from the cold, even in extreme conditions. Within minutes of turning it on, you'll start to feel the warmth.
- Versatile Use: Heated clothing is not limited to camping. You can use it for various outdoor activities such as hiking, skiing, snowboarding, and even everyday use during the winter months.
Tips for Using Heated Clothing:
- Layer Properly: Wear your heated clothing as a part of your layering system. Start with a moisture-wicking base layer, add the heated garment, and finish with a windproof and waterproof outer layer.
- Conserve Battery: To maximize battery life, use the lowest heat setting that keeps you comfortable. Carrying spare batteries is also a good idea.
- Positioning: Ensure that the heating elements are positioned correctly. For example, heated gloves should fit snugly, and heated socks should be worn over a thin, moisture-wicking sock.
- Safety: Be mindful of safety precautions when using heated clothing. Avoid overusing them on the highest heat setting, and follow manufacturer guidelines to prevent overheating or damage.
- Carry Spare Parts: If you rely heavily on heated clothing during cold-weather trips, consider carrying spare batteries and charging equipment to ensure you always have a power source.
Incorporating heated clothing into your hammock camping gear can significantly enhance your cold-weather comfort. It's an investment worth considering, especially if you frequently engage in outdoor activities in cold climates.
Check out these guides for the best heated clothing:
- Best heated jackets
- Best heated vests
- Best heated pants
- Best heated base layers
- Best heated gloves
- Best heated socks
- Best heated hoodies
2) Choosing The Right Hammock
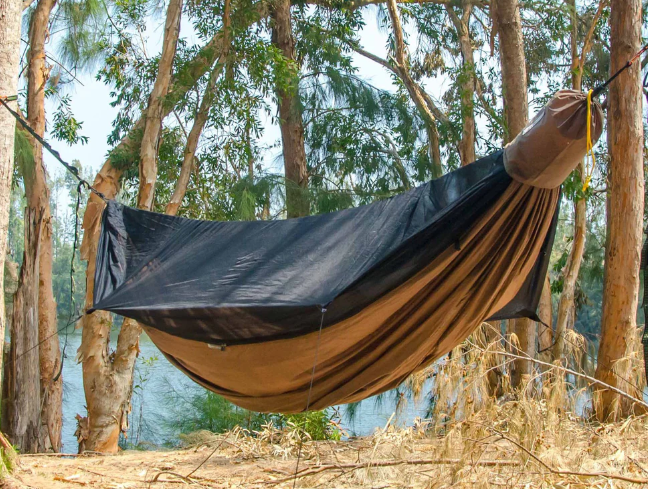
Choosing the right hammock and insulation is crucial for staying warm and comfortable during cold-weather hammock camping. Here's an expanded explanation of how to make the right choices:
Selecting the Right Hammock:
Material: Hammocks come in various materials, with the most common being nylon and polyester. For cold weather, nylon hammocks are generally preferred because they are lighter and more breathable. They also tend to dry faster if they get wet.
Double-Layer Design: A double-layer hammock has an extra layer of fabric beneath you, which can accommodate an insulating pad or underquilt more effectively. This design helps trap warmth and provides better insulation.
Length and Width: Choose a hammock that suits your body size and comfort preferences. Longer hammocks provide more diagonal space for a flatter and more comfortable sleeping position. Wider hammocks offer additional space for shifting around during the night.
Weight Capacity: Ensure that the hammock can support your weight and any additional gear you plan to bring. Most quality hammocks have weight ratings listed by the manufacturer.
Suspension System: Invest in a good suspension system, like tree straps, that won't harm the trees and allows for easy adjustments. An adjustable suspension system is especially helpful for achieving the right hang and comfort.
Insulation Options for Cold-Weather Hammock Camping:
Underquilt: An underquilt is arguably the most effective insulation for hammock camping in cold weather. It hangs beneath your hammock, forming an insulating barrier between you and the cold air. It's designed to trap warm air, preventing it from escaping and keeping you warm throughout the night. Make sure the underquilt matches the dimensions of your hammock.
Top Quilt or Sleeping Bag: To insulate the top side of your body, you can use a top quilt or a sleeping bag. Look for models designed for hammock use, as they often have features like zipperless footboxes and adjustable straps to secure them around your hammock.
Pad or Mat: If you don't have an underquilt, you can use a closed-cell foam pad or an inflatable sleeping pad inside your hammock. Place it between your hammock and your sleeping bag to provide some insulation. Ensure it covers your entire body length to prevent cold spots.
Reflective Insulation: Reflective insulation, often made of materials like mylar, can be added to your hammock setup to help retain heat. Some hammock manufacturers offer hammocks with built-in reflective layers or sell aftermarket accessories that can be attached to your hammock.
Hammock Socks: Hammock socks are weather-resistant covers that encapsulate your hammock, providing an additional layer of insulation and wind protection. They can be particularly useful in extremely cold or windy conditions.
Tips for Insulating Your Hammock:
Properly Hang Your Underquilt: Ensure that your underquilt is hung snugly and that there are no gaps between it and the hammock. Adjust the suspension straps to achieve the right tension.
Combine Insulation Methods: In extremely cold conditions, it's wise to use a combination of insulation methods. For example, use both an underquilt and a top quilt or sleeping bag, along with an insulating pad if needed.
Test Your Setup: Before embarking on a cold-weather hammock camping trip, set up your gear and test it in milder conditions to ensure it functions as expected and that you're comfortable with the setup.
Stay Dry: Moisture can reduce the effectiveness of insulation. Make sure your hammock, quilts, and clothing are dry before settling in for the night.
Choosing the right hammock and insulation is essential for staying warm while hammock camping in cold weather. Tailoring your gear to the specific conditions and investing in quality equipment can make your outdoor adventures more enjoyable and comfortable during the colder months.
3) Proper Hammock Setup
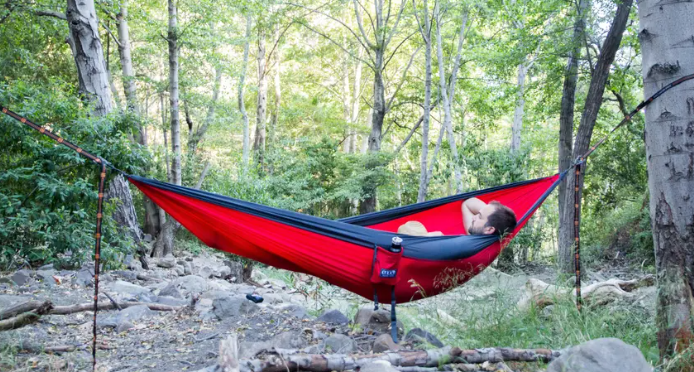
Properly setting up your hammock is crucial for ensuring a safe and comfortable camping experience. A well-executed hammock setup not only provides a cozy place to sleep but also minimizes the risk of accidents. Here's an expanded explanation of how to set up a hammock correctly:
1. Location and Site Selection:
Choose the Right Location: Look for sturdy anchor points for your hammock, such as two healthy trees or sturdy posts. Ensure that the anchor points are strong and healthy enough to support your weight.
Check Regulations: In some areas, there may be rules or regulations regarding hammock camping. Make sure to check and follow any such guidelines.
Leave No Trace: Practice Leave No Trace principles by selecting a site that is at least 200 feet away from water sources and trails to minimize your environmental impact.
2. Hammock and Suspension System:
Inspect Your Hammock: Before setting up, check your hammock for any signs of wear and tear, such as frayed straps or damaged fabric. Ensure it's in good condition.
Suspension System: Use tree-friendly suspension straps that won't damage the trees. Avoid using ropes or cords that can cut into the tree bark.
Hang at the Right Height: The ideal height for hanging your hammock is usually about 18 inches to 2 feet off the ground. This allows for easy entry and exit while preventing you from touching the ground when you're in the hammock.
3. Hanging the Hammock:
Distance Between Trees: The distance between your anchor points should be approximately 10-15 feet, depending on the length of your hammock and the desired amount of sag. Longer hammocks require more distance.
Angle of Hang: Aim for a 30-degree angle of hang. This provides the most comfortable sleeping position. You can use a hammock-specific suspension system with adjustable straps to achieve the right angle.
Test for Comfort: Before fully committing to your setup, sit or lie down in the hammock to make sure it feels comfortable and secure.
4. Tarp or Rainfly Setup:
Weather Protection: If there's a chance of rain, set up a tarp or rainfly above your hammock. Ensure that it's pitched correctly to direct rainwater away from your hammock. Consider using a ridgeline to hang your tarp at a consistent height.
Stake Out the Edges: Secure the corners of your tarp to the ground with stakes or tie-outs to prevent flapping in the wind and to maintain proper tension.
5. Insulation and Gear Setup:
Underquilt or Insulating Pad: If camping in cold weather, attach your underquilt to the underside of your hammock or lay an insulating pad inside the hammock. Ensure there are no gaps to prevent cold air from reaching you.
Top Quilt or Sleeping Bag: Place your top quilt or sleeping bag inside the hammock for insulation from above. Make sure it's properly zipped or secured to keep warm air in and cold air out.
Gear Storage: Keep your gear off the ground by hanging it on a separate line or using a gear loft inside your hammock.
6. Final Safety Checks:
Weight Limit: Ensure that your hammock and suspension system can support your weight and any additional gear you plan to have in the hammock.
Knots and Hardware: Double-check all knots and hardware for security. Make sure everything is properly tightened and secure.
Leave Room for Sway: Remember that hammocks will sway when you get in and out or move around. Ensure that there's enough space around your hammock to prevent collisions with trees or other objects.
Setting up your hammock correctly is essential for a safe and enjoyable camping experience. Take your time to carefully select your site, inspect your gear, and follow best practices for hanging and securing your hammock. With the right setup, you can fully enjoy the comfort and relaxation that hammock camping has to offer.
4) Sleeping Bag
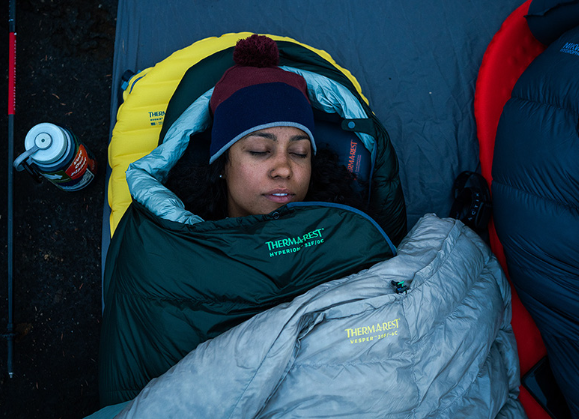
A sleeping bag is a crucial piece of gear for camping and outdoor adventures, providing insulation and warmth while you sleep. It's important to choose the right sleeping bag to match your needs and the conditions you'll encounter. Here's an expanded explanation of sleeping bags, including their types, features, and how to select the right one:
Types of Sleeping Bags:
Mummy Bag: These are the most common type of sleeping bags. They have a tapered shape that narrows towards the feet, which helps trap heat more efficiently. Mummy bags are ideal for cold weather camping and backpacking.
Rectangular Bag: Rectangular sleeping bags have a more spacious and rectangular shape. They provide more room to move but may not be as efficient at retaining heat as mummy bags. They are suitable for warm-weather camping and car camping.
Semi-Rectangular Bag: These sleeping bags combine some of the characteristics of mummy and rectangular bags. They offer a bit more room for comfort while still providing decent insulation.
Double Sleeping Bag: Designed for couples, double sleeping bags can accommodate two people. They are available in various shapes, including rectangular and tapered designs.
Key Features of Sleeping Bags:
Temperature Rating: Sleeping bags are rated for different temperature ranges, typically as three-season (for spring, summer, and fall), winter, or extreme-cold conditions. Choose a bag with a temperature rating suitable for the lowest temperatures you expect to encounter.
Insulation Type:
- Down Insulation: Down sleeping bags are lightweight, highly compressible, and provide excellent warmth. However, they lose insulation properties when wet.
- Synthetic Insulation: Synthetic sleeping bags are more water-resistant and retain insulation when damp. They are a good choice for wet conditions but tend to be bulkier and heavier than down bags.
Fill Power: For down sleeping bags, the fill power indicates the quality and loft of the down. Higher fill power (e.g., 800+) means better insulation with less weight.
Weight and Packability: For backpacking, consider the weight and pack size of your sleeping bag, as you'll need to carry it in your backpack. Down bags are generally lighter and more compressible than synthetic bags.
Shape and Size: Choose a sleeping bag that matches your body size and sleeping style. A properly sized bag should allow you to stretch your legs comfortably but not have excessive empty space, as this can make it harder to retain warmth.
Zippers: Look for a sleeping bag with high-quality zippers that don't snag easily. Some bags have two-way zippers for ventilation and ease of use.
Hood and Draft Collar: A hood keeps your head warm, and a draft collar prevents warm air from escaping through the neck opening. These features are essential for cold-weather camping.
Insulated Baffles: Baffles are chambers that hold insulation in place within the sleeping bag. Continuous baffles allow you to shift insulation for optimal comfort.
How to Choose the Right Sleeping Bag:
Consider the Season: Think about the seasons you'll be camping in. A three-season bag is versatile for spring, summer, and fall, while a winter bag is necessary for colder conditions.
Assess Temperature Ratings: Select a sleeping bag with a temperature rating slightly lower than the lowest expected temperature. This provides a safety margin and ensures you stay warm.
Think About Weight: If you're backpacking, prioritize a lightweight sleeping bag that won't add excessive weight to your pack.
Insulation Type: Decide between down and synthetic insulation based on the conditions you'll encounter and your budget.
Size and Shape: Ensure the bag fits your body size comfortably, and choose a shape that suits your sleeping style and comfort preferences.
Price: Sleeping bags vary widely in price. Balance your budget with the features and quality you need for your intended use.
Brand and Reviews: Research reputable brands and read reviews from other campers to get a sense of a sleeping bag's performance and durability.
Remember that proper care and maintenance of your sleeping bag, including storing it correctly and keeping it clean, can extend its lifespan and ensure it continues to provide reliable warmth and comfort on your outdoor adventures.
5) Hot Drinks And Snacks
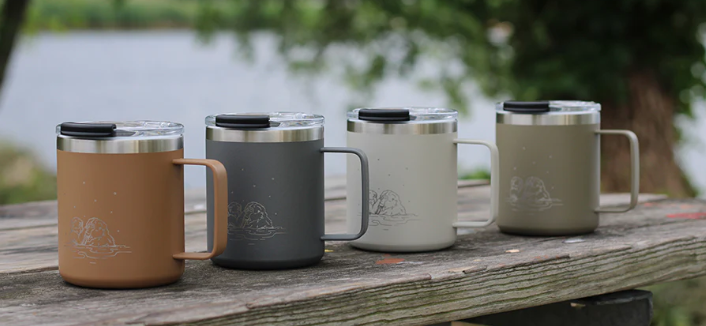
Hot drinks and snacks are not just a source of comfort and pleasure during outdoor adventures; they also play a critical role in keeping you warm, nourished, and hydrated, especially in cold weather. Here's an expanded explanation of hot drinks and snacks for camping and hiking:
Hot Drinks:
Tea: Tea is a popular choice for outdoor enthusiasts due to its versatility and wide variety of flavors. Herbal teas like chamomile or peppermint can be soothing before bedtime, while black or green teas can provide a morning caffeine boost.
Coffee: For many, coffee is a camping essential. You can bring pre-ground coffee and a portable coffee maker like a French press or pour-over system. Instant coffee is another convenient option. Just add hot water for a quick caffeine fix.
Hot Chocolate: Hot chocolate is a delightful treat, especially for kids. You can bring pre-made hot chocolate mix or cocoa powder and add hot water or milk. Consider adding marshmallows or whipped cream for extra indulgence.
Warm Fruit Infusions: You can make fruit-infused hot water by adding slices of citrus fruits like oranges or lemons to your water bottle and letting it steep. This not only adds flavor but also provides a vitamin C boost.
Broth or Soup: Hearty soups or broths in a thermos can provide warmth and nourishment. These are great for cold-weather hikes and camping trips, as they offer both hydration and calories.
Hot Snacks:
Instant Oatmeal: Instant oatmeal packets are convenient and provide a warm and filling breakfast option. Just add hot water, stir, and enjoy.
Instant Noodles: Cup noodles or instant ramen are quick to prepare and can satisfy your hunger while providing warmth. Look for low-sodium options if you're concerned about your salt intake.
Trail Mix: Warm trail mix by placing it in a microwave-safe container or wrapping it in foil and heating it near the campfire. The warmth enhances the flavors of nuts, dried fruits, and chocolate.
Hot Sandwiches: Grilled cheese or panini sandwiches are a cozy and hearty snack. You can prepare them in advance and warm them using a portable camping stove or a campfire grate.
Baked Potatoes: Wrap potatoes in aluminum foil and cook them in the campfire coals until they're tender. Top with butter, cheese, or your favorite toppings for a warm and satisfying snack.
Peanut Butter and Honey Sandwiches: A classic hiking snack, peanut butter and honey sandwiches provide quick energy and warmth.
Tips for Hot Drinks and Snacks:
Use Insulated Containers: Insulated containers like thermoses keep hot drinks and snacks warm for longer periods, making them ideal for outdoor adventures.
Carry a Portable Stove: If you have the means, a portable camping stove allows you to heat water and cook hot meals and drinks more easily.
Be Mindful of Waste: Practice Leave No Trace principles by packing out all trash, including used tea bags, coffee grounds, and food wrappers.
Stay Hydrated: While it's essential to enjoy hot drinks, don't forget to drink enough water. Dehydration can contribute to feeling cold, so maintain a balance between hot beverages and plain water.
Check for Fire Restrictions: If you plan to heat snacks or drinks over a campfire, check for local fire restrictions and use designated fire rings or stoves as needed.
Hot drinks and snacks not only provide physical warmth but also offer psychological comfort during cold outdoor adventures. They can boost your morale, keep you energized, and make your camping or hiking experience more enjoyable, especially when the temperature drops.
6) Stay Active
Staying active is a crucial part of staying warm and comfortable during cold weather outdoor activities, such as camping, hiking, or even just spending time in the great outdoors. Here's an expanded explanation of why and how to stay active in cold weather:
Why Stay Active in Cold Weather:
Generate Body Heat: Physical activity generates heat through muscle movement, which helps raise your body temperature. This is particularly important in cold conditions when your body is at risk of losing heat to the environment.
Increase Blood Circulation: Exercise promotes better blood circulation, which helps distribute warm blood to your extremities, keeping your fingers and toes warm.
Maintain Core Temperature: Staying active can prevent your core body temperature from dropping, reducing the risk of hypothermia and frostbite.
Boost Energy Levels: Cold weather can make you feel sluggish. Exercise can boost your energy and motivation, helping you stay alert and engaged.
Tips for Staying Active in Cold Weather:
Warm-Up: Before engaging in any strenuous activity, warm up your muscles and joints to prevent injury. Gentle stretches, jumping jacks, or a short walk can help.
Layer Clothing: Dress in layers so that you can remove or add clothing as needed to regulate your body temperature. Start with a moisture-wicking base layer, add insulating layers for warmth, and finish with a windproof and waterproof outer layer.
Choose Appropriate Activities: Pick activities suitable for the environment and your skill level. Activities like hiking, skiing, snowshoeing, or simply walking are excellent choices for staying active in the cold.
Keep Moving: While out in the cold, try to keep moving as much as possible. Even minor movements, like wiggling your fingers and toes, can help increase circulation.
Stay Hydrated: In cold weather, you might not feel as thirsty, but it's essential to stay hydrated. Dehydration can make you more susceptible to the cold.
Take Breaks: It's crucial to rest and warm up when necessary. Plan for regular breaks during your outdoor activities to prevent exhaustion and to check for signs of cold-related illnesses.
Use Proper Gear: Invest in appropriate gear for your chosen activity. For example, use insulated gloves, hats, and footwear designed for cold weather activities. This will help keep you comfortable and safe.
Travel with a Buddy: If possible, engage in activities with a friend or group. Not only is it safer, but it also provides motivation and social interaction to keep you active.
Stay Informed: Pay attention to weather forecasts and be prepared for changing conditions. Know the signs of cold-related illnesses, such as hypothermia and frostbite, and how to respond to them.
Be Flexible: Be prepared to adjust your plans if conditions become too extreme or if you or someone in your group starts showing signs of cold-related issues.
Stay Positive: Staying active in the cold can be challenging, but maintaining a positive attitude and focusing on the beauty of the winter landscape can make the experience more enjoyable.
Remember that staying active in cold weather requires a combination of proper clothing, preparation, and awareness of your body's needs. With the right mindset and precautions, you can safely and comfortably enjoy outdoor activities during the colder months while reaping the physical and mental benefits of staying active in nature.
7) Hammock Sock
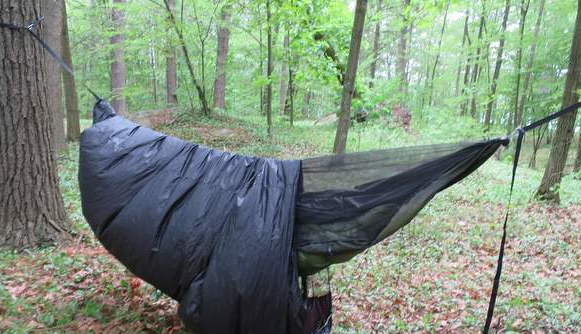
A hammock sock, also known as a hammock cocoon or hammock underquilt protector, is an accessory designed to enhance the comfort and insulation of your hammock camping experience, especially in cold or windy conditions. It's essentially a weather-resistant cover that encapsulates your hammock, providing an additional layer of insulation and wind protection. Here's an expanded explanation of hammock socks:
Features and Benefits of Hammock Socks:
Weather Protection: Hammock socks are primarily designed to shield your hammock setup from the elements. They act as a barrier against rain, snow, wind, and even insects, keeping you dry and warm inside your hammock.
Enhanced Insulation: By encasing your hammock, a hammock sock helps trap warm air and reduce convective heat loss, which is a common issue in cold weather. This added insulation can significantly improve your comfort and warmth.
Wind Blocker: Wind can quickly steal away your body heat, making it feel much colder than the actual temperature. A hammock sock acts as a windbreaker, reducing the chilling effects of wind gusts.
Insect Protection: In areas with abundant bugs, a hammock sock can provide a bug-proof shelter, allowing you to enjoy the outdoors without the annoyance of insects.
Easy Setup: Most hammock socks are designed for hassle-free installation. They often come with drawstrings, zippers, or snaps that make it easy to enclose your hammock quickly.
Customizable Ventilation: Many hammock socks have adjustable openings or vents that allow you to regulate airflow and temperature inside the hammock. This is essential for preventing condensation and maintaining comfort.
How to Use a Hammock Sock:
Choose the Right Size: Make sure your hammock sock is compatible with your hammock's dimensions. It should be long enough to cover your entire hammock setup.
Set Up Your Hammock: Hang your hammock between two anchor points and ensure it's properly adjusted and taut.
Install the Hammock Sock: Slide the hammock sock over your hammock, starting from one end and working your way to the other. Ensure that the hammock sock is secure and properly aligned with your hammock.
Adjust Ventilation: Depending on the weather conditions, adjust any vents or openings on the hammock sock to control airflow and temperature inside the hammock.
Enter and Secure: Carefully crawl into your hammock through the hammock sock's opening, and then close it securely using drawstrings, zippers, or snaps.
Final Adjustments: Make any final adjustments to ensure the hammock sock is properly sealed and that you have enough ventilation for comfort.
Stay Dry and Warm: Enjoy the added protection from the elements and the improved insulation provided by the hammock sock.
Considerations:
Compatibility: Ensure that the hammock sock you choose is compatible with your specific hammock model and size.
Weight and Packability: Depending on the material and features, hammock socks can add weight to your gear, so consider this if you're backpacking.
Ventilation: Properly manage ventilation to avoid condensation inside the hammock sock, which can make you damp and cold.
Quality and Durability: Invest in a high-quality hammock sock made from durable, weather-resistant materials to ensure it withstands the rigors of outdoor use.
Hammock socks can be a valuable addition to your hammock camping gear, especially in colder or wetter climates. They provide an extra layer of protection, insulation, and comfort, making your outdoor adventures more enjoyable and cozy.
8) Stay Dry
Staying dry is paramount for outdoor comfort and safety, particularly during inclement weather or wet conditions. Whether you're camping, hiking, or engaging in any outdoor activity, staying dry helps prevent hypothermia, maintain body heat, and avoid discomfort. Here's an expanded explanation of how to stay dry outdoors:
1. Choose the Right Clothing:
Waterproof Outer Layer: Invest in a high-quality waterproof and breathable rain jacket and rain pants. Look for materials like Gore-Tex or eVent for effective waterproofing and breathability.
Rain Gear: Use a waterproof rain cover for your backpack to protect your gear from getting wet. Waterproof gaiters can also help keep your feet and lower legs dry in heavy rain or when traversing wet terrain.
Quick-Drying Fabrics: Wear moisture-wicking and quick-drying base layers to help move sweat away from your skin. Avoid cotton clothing, as it retains moisture and can lead to hypothermia.
Waterproof Footwear: Invest in waterproof hiking boots or shoes with Gore-Tex or similar technology to keep your feet dry in wet conditions. Gaiters can add extra protection for your lower legs.
**2. Proper Rain Shelter:
Tents and Tarps: Choose a waterproof and properly seam-sealed tent or tarp for shelter. Ensure your tent's rainfly covers the entire tent body and extends away from it to prevent rain from dripping inside.
Hammock Rainfly: If you're using a hammock for camping, make sure you have a rainfly that adequately covers your hammock setup to keep you dry.
**3. Effective Packing and Storage:
Dry Bags: Use dry bags or waterproof stuff sacks to protect essential gear and clothing inside your backpack. Consider color-coded bags to keep items organized.
Pack Liners: Line the inside of your backpack with a waterproof pack liner or a heavy-duty garbage bag to keep the contents dry.
Ziplock Bags: For small electronics, maps, or documents, seal them in ziplock bags to provide an extra layer of protection against moisture.
**4. Rainy Weather Practices:
Layering: In cold or wet conditions, layer your clothing for insulation. Even if your outer layer is waterproof, an inner layer can provide additional warmth.
Stay Under Cover: During heavy rain, seek shelter under trees or rocky overhangs if it's safe to do so. Avoid standing under tall trees during lightning storms.
Drip Lines: When setting up camp, be mindful of setting up beneath branches that may drip water onto your shelter. Clear debris or snow buildup from the tops of your tent or rainfly.
**5. Dry Your Gear:
Proper Ventilation: In your tent or shelter, ensure proper ventilation to prevent condensation. Keep vents open, and use breathable materials where possible.
Hang Wet Gear: If possible, hang wet clothing and gear to dry during periods of clear weather or inside your shelter. Use paracord or a gear loft for this purpose.
Solar Drying: Take advantage of sunny breaks to dry out your gear. Hang wet items in direct sunlight to expedite the drying process.
**6. Emergency Wet Weather Gear:
Emergency Poncho: Carry a compact, disposable emergency poncho or a Mylar blanket as a backup in case of unexpected rain.
Shelter Building Skills: Learn basic wilderness shelter-building techniques, such as creating a debris hut or lean-to, which can provide protection from rain in emergencies.
Staying dry is essential for outdoor comfort and safety. Proper clothing, gear, and practices can help you avoid hypothermia, discomfort, and the negative effects of prolonged exposure to wet conditions. Being prepared for wet weather ensures you can enjoy your outdoor adventures regardless of the forecast.
